Over the last year, I've had many requests for iPhoneography tutorials and I'm finally getting down to it. Today I'm going to share the process by which I transformed this photograph, shot with my iPhone 3GS, whilst wandering around "le vieux Lille" in December 2010...

Into this...

Before we begin, a few words about technical perfection. Currently, I use an iPhone 3GS, which everyone agrees, does not have a great camera. Many iPhoneographers utilise apps designed to extend the capability of iPhone cameras but as I like to make images that look flawed in some way, I find that it helps if I begin with a less than perfect photograph. That way, any under or over-exposed areas, motion blur and odd reflections inform my compositional and processing choices. They also give me a head-start in the grunge stakes.
If you wish to work with my original photograph whilst following this tutorial, feel free to download it. However, please remember that the photograph and any processed versions of it, retain my copyright and are not to be used for any other purpose other than following the tutorial.
Ready? Ok! So here are the apps you'll need:

1. Resize, Crop and recolour: 100 Cameras in 1
Before importing an image onto this app, check the export resolution settings: Splash Screen> Options>Resolution (I choose high so that I can print the image if I wish)
This must surely rank as the most girlie iPhoneography app EVER. If you're attempting any kind of diet or Lenten abstinence, I recommend that you abandon this tutorial right now! 100 Cameras in 1 starts up with a sweet little tinkly tune that might make you think that you've downloaded a bliss-out meditation app by mistake. Once you've imported a photograph, you're greeted with an image depicting a stack of delicious-looking biscuits accompanied by the message: "baking cookies mmmm". The iPad version is even more potentially hazardous, tempting us with seductive Belgium Chocolates. You have been warned!
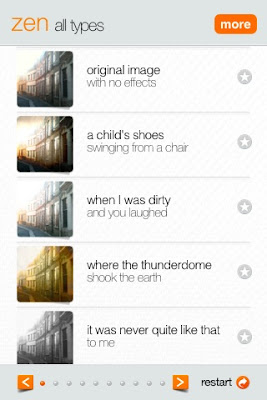
Once you've imported a photograph, you can resize/crop it within the app before browsing through 100 poetically-named presets, grouped into sets of ten
Choose ZEN>"where the thunderdome shook the earth"
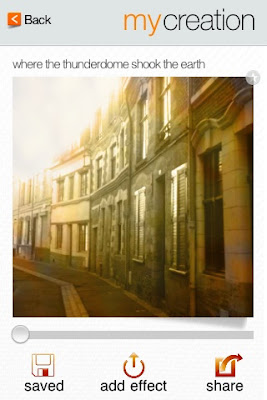 The next screen provides a slider so that, if you wish, you can modify the preset
We are going to select the lowest setting and save to camera roll.
This app is described as a game and has some kind if point-scoring system. As I’m not remotely competitive, I haven’t looked into this. If someone tells me I’ll win real cookies and chocolates if I collect points, then obviously, I will pay more attention.
2. Add texture: PIC GRUNGER
Once again, before importing a photograph into this app, select the RESOLUTION button on the splash screen to set your desired output resolution. Happy? Ok, now import!
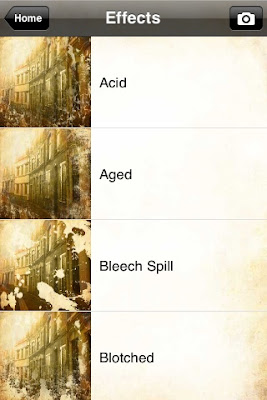
In EFFECTS choose AGED
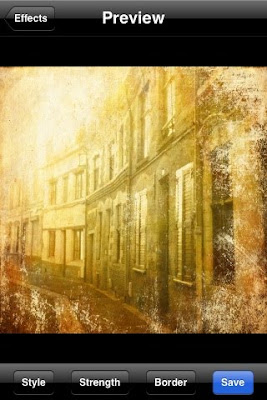
The preview screen displays the photo with applied effect and offers further opportunities to modify it. Select STYLE
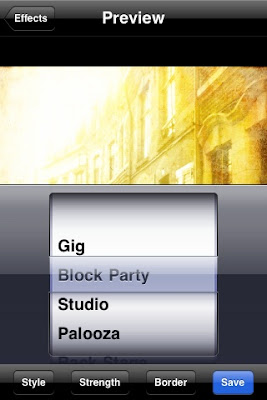
select BLOCK PARTY (yay!)
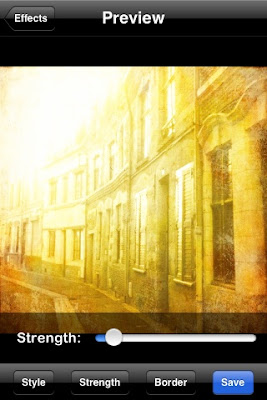
Select STRENGTH and adjust with the slider
(I chose a low setting: don't want the neighbours complaining about the noise)
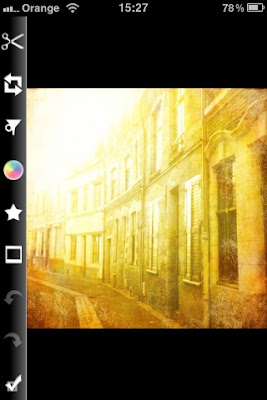
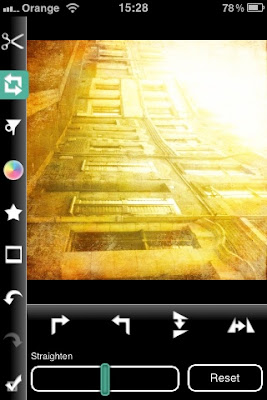
I incorporate rotation into my work flow so that any generic app presets such as grunge effects and light leaks won't be applied in the same areas of every single image and hopefully, the apps used will be less recognisable.
4. Adjust colour and add extra texture in PICTURE SHOW
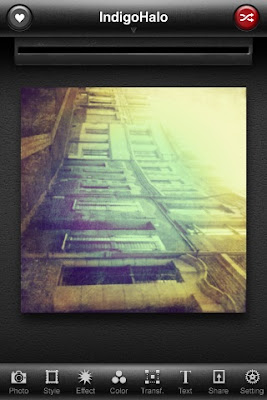
Choose INDIGO HALO
then
select the icon at the bottom of the screen named STYLE
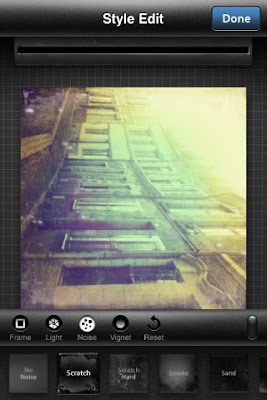
Frame = no frame, Light = No light leak, Noise = Scratch, Vignet = none
Hit DONE and save to camera roll (SHARE)
Now the photograph should look like this...

5.We're going to add some atmospheric blur in LoMob but we have to be a little tricksy about it. Here's why: the screenshots below illustrate where the blur would be applied to the photograph in its original layout...

I love the blur effect you get with the LoMob Tri-Black film preset BUT I want to apply it to the left-hand side of the photograph rather than the right, so that the far end of the street is out of focus, and the grunge-texture in the lower left-hand corner is softened.
So...
import the photograph back into PhotoGene and rotate to look like this...

6. Add atmospheric blur to the desired part of photograph in LOMOB
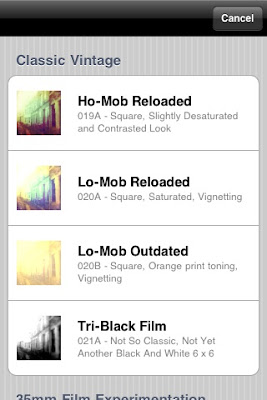
Select CLASSIC VINTAGE> TRI-BLACK
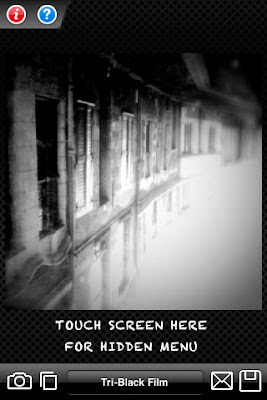
Anyone who remembers those wonderful point and click computer games MYST and RIVEN will feel a hint of nostalgia doing this next bit, because you're looking for an invisible button.
Touch the screen in the space shown in the above screenshot
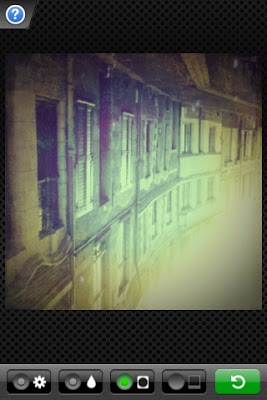
Shazam!
A set of buttons appear. Use these to switch elements of the preset on and off. If you copy the settings in the screenshot above and then hit the little wheel button on the bottom left of the screen, you'll switch off the B&W and vignette effects leaving just the blur. However, you won't see the blur until you render a preview by hitting the green arrow/return icon on the bottom right of the screen. In case you're thinking that's a bit complicated, it is. Friendly message to LoMob developers: please get it sorted!
7. Flip and Rotate in PHOTOGENE (dizzy? I promise this is the last time)
I decided that I preferred the photograph's composition in reverse from the original and so saved it like this...

That's it, all done!
I hope you've found this tutorial both useful and enjoyable. Please do send feedback and if you've processed any of your own photographs whist following the tutorial, I'd love to see the results!

10 comments:
What a great tutorial !
Thanks for taking the time to put this together.
I've had lots of fun with 100 cameras, Picture Show and Vintage Grunger and it does seem to require quite a bit of back & forth - but that's just part of the game.
Such fun to see your work here -
judith
Wow! I have used all of these apps many times and never once did I think about rotating the image to get different effects! How clever. Actually, Genius! You've opened a whole new bunch of creativity in my head. Thank you! So cool. ;)
well...you've just cost me money....i need to have a look at lomob and the first app as well.... yesterday Knox Bronson put me on to touchretouch for cloning out stuff and now this....i'll be bankrupt soon....
angel on my right shoulder says step away from the iphone while devil on my left licks her lips in anticipation of downloading these goodies.
generous tutorial- thanks so much
Wow. This post must have taken a lot of time. Thank you. I think I will be trading my Blackberry in for an iPhone sometime this year. I am going to bookmark your tutorial to use in the future. Thanks!
THANK YOU. This has helped me pass a lot of time in the hospital this week...I am posting my iPhone art Wednesday at 6am pacific on my blog. So fun! xo
Great tutorial - thanks so much for sharing! You also cost me a bit of $$ in the app shop :)
Thank you for the tutorial, now I have even more iPhoneography apps to play with...
Btw, have you tried playing with Hipstamatic? Or perhaps the Pudding Camera (it's Korean, but you can find it by putting Pudding Camera)
New to blogging and just discovering a whole new world of art apps. Thank you for the turtorial. I really love Pic Grunge and Photogene together also....thought I was the only one that went back and forth using multiple apps like this. :)
lafindingplace.blogspot.com
Thanks very much for putting this together. I know have a very nice pic of Waitrose sitting underneath all processes you describe.
Post a Comment