Showing posts with label iphone art. Show all posts

Tuesday, March 27, 2012

Collage Journeys With A Stylus


My collage work is all about story-telling, but the story I set out with the intention of sharing may not be the one that unfolds as a collage takes shape: it's fun to allow the pictorial elements to find their own narrative. Take, for instance, this recent piece: I had a working title in my head and was collecting material to assemble, but once I'd found the little dog, the story took a completely different turn. After some resistance, I decided to put my original idea away for another day. Here is where this particular collage journey led me...


The Journey

iPhone/iPad collage

However, things didn't quite stop there...


His Mistress's Eyes
iPhone/iPad collage

Sadly, I know nothing of the beautiful woman featured in these images, but I'm hoping that she had a sense of humour. Her cabinet portrait, shot in the studio of M. Wright, Portrait Miniature Painter and Photographer of 75 Albert Road, Middlesborough, was purchased at Kettering Market, Northamptonshire, almost thirty years ago. Other elements of the collage have been extracted from photographs in the Creative Commons: the little dog can be found in the State Library and Archives of Florida.

Digital collage making is much easier with a stylus. There's a growing number to choose from and currently, I'm on my fourth...


Above: The contents of my digital pencil case
left-right: Nomad, AluPen, Stylus sock, Pogo Sketch


Nomad
Recently, I've been experimenting with a NOMAD (purchased when there was a half-price offer which compensated somewhat for expensive shipping from the US). It's not actually a stylus at all, but a brush. Mine is the NOMAD COMPOSE DUO Long Tip. It has a long, soft brush at one end and a stubby one at the other, so it's possible to edit with flowing, painterly strokes, or do more precise work. I've found it especially effective for blending and editing layer masks or softening the edges of extractions. The brush size makes it suitable only for iPad work but there is a mini iPhone version. The Nomad is not a budget buy but as it's now available in the UK (from Sampli.co.uk) you'll spend less on postage than I did!


AluPen
I used to love the AluPen's chunky size and the extra weight. It feels great in the hand, but after very little use, mine is beginning to fall apart: the rubber tip is loosing touch-screen effectiveness (possibly due to grease build-up) and is coming unfixed from the casing. A tweet to InCase, the company who produce the AluPen, has met with no response, so sorry InCase, I can't recommend your product or customer service.


Stylus Sock Pro
My latest discovery, gifted by friend Paul Kercal, a talented Mobile Artist and inspiring educator, is the STYLUS SOCK PRO. The "Pro" bit indicates that this is a new "improved" version of the Sock's former plastic incarnation. It now has a wooden paintbrush-style handle, with fabric covering the business end. The tip looks a bit stumpy, but the iPad requires a tip of at least 5mm to make contact. It's actually slightly shaped and by working with the thinner edge, I get broken lines : a drawing technique that I find useful. The Sock feels very comfortable in the hand and I'm enjoying using it.


Pogo Sketch
If you don't want to splash out lots of cash, there's always the trusty POGO SKETCH. My two have seen hundreds of hours use and the foam tips are still intact. A budget stylus, it remains the one I recommend to beginners

The stylus photos above were shot using the Groupie Snap Pack from Hipstamatic. The Dylan Film has a soft, milky look and at least six randomly generated light leaks, or sometimes, no light leak at all. I had to take at least four shots for each image, to get one in which a light leak didn't obscure the area of the photograph that I most wanted to see. Thus far, I've only tried this film with the accompanying Adler 9009 lens but
I'm already a fan its particular vintage look, despite the unpredictable light leak issue.

Before I sign-off, I'd like to share the news that one of my iPhone images has reached final selection in the Fine Art category of the 2012 Julia Margaret Cameron Photography Awards.


Guardian

shot and processed iPhone 4S


Friday, April 15, 2011

iPhoneography Tutorial 01: Vintage French Street Scene


Over the last year, I've had many requests for iPhoneography tutorials and I'm finally getting down to it. Today I'm going to share the process by which I transformed this photograph, shot with my iPhone 3GS, whilst wandering around "le vieux Lille" in December 2010...


Into this...


Before we begin, a few words about technical perfection. Currently, I use an iPhone 3GS, which everyone agrees, does not have a great camera. Many iPhoneographers utilise apps designed to extend the capability of iPhone cameras but as I like to make images that look flawed in some way, I find that it helps if I begin with a less than perfect photograph. That way, any under or over-exposed areas, motion blur and odd reflections inform my compositional and processing choices. They also give me a head-start in the grunge stakes.

If you wish to work with my original photograph whilst following this tutorial, feel free to download it. However, please remember that the photograph and any processed versions of it, retain my copyright and are not to be used for any other purpose other than following the tutorial.

Ready? Ok! So here are the apps you'll need:


1. Resize, Crop and recolour: 100 Cameras in 1

Before importing an image onto this app, check the export resolution settings: Splash Screen> Options>Resolution (I choose high so that I can print the image if I wish)

This must surely rank as the most girlie iPhoneography app EVER. If you're attempting any kind of diet or Lenten abstinence, I recommend that you abandon this tutorial right now! 100 Cameras in 1 starts up with a sweet little tinkly tune that might make you think that you've downloaded a bliss-out meditation app by mistake. Once you've imported a photograph, you're greeted with an image depicting a stack of delicious-looking biscuits accompanied by the message: "baking cookies mmmm". The iPad version is even more potentially hazardous, tempting us with seductive Belgium Chocolates. You have been warned!


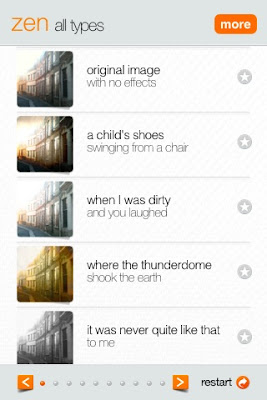
Once you've imported a photograph, you can resize/crop it within the app before browsing through 100 poetically-named presets, grouped into sets of ten
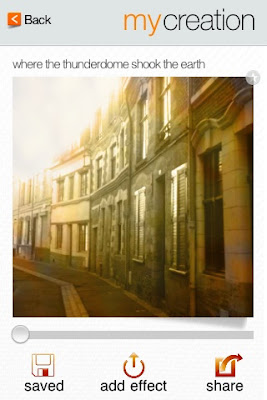
Choose ZEN>"where the thunderdome shook the earth"

The next screen provides a slider so that, if you wish, you can modify the preset
We are going to select the lowest setting and save to camera roll.


This app is described as a game and has some kind if point-scoring system. As I’m not remotely competitive, I haven’t looked into this. If someone tells me I’ll win real cookies and chocolates if I collect points, then obviously, I will pay more attention.


2. Add texture: PIC GRUNGER

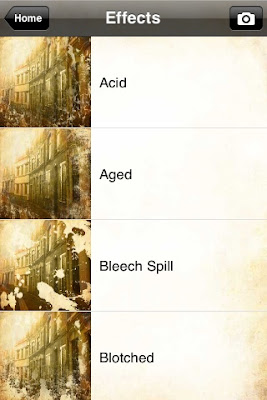
Once again, before importing a photograph into this app, select the RESOLUTION button on the splash screen to set your desired output resolution. Happy? Ok, now import!


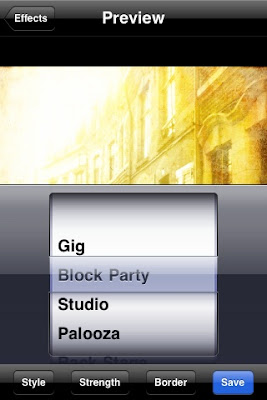
In EFFECTS choose AGED


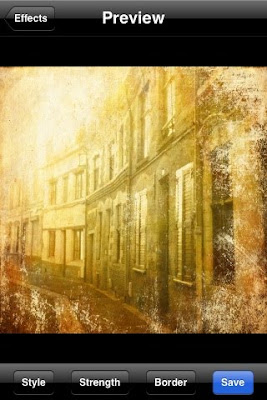
The preview screen displays the photo with applied effect and offers further opportunities to modify it. Select STYLE


select BLOCK PARTY (yay!)


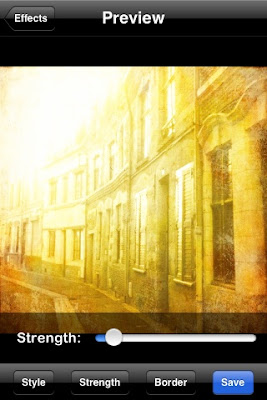
Select STRENGTH and adjust with the slider
(I chose a low setting: don't want the neighbours complaining about the noise)


3. Rotate image in PHOTOGENE and save to camera roll


I incorporate rotation into my work flow so that any generic app presets such as grunge effects and light leaks won't be applied in the same areas of every single image and hopefully, the apps used will be less recognisable.


4. Adjust colour and add extra texture in PICTURE SHOW


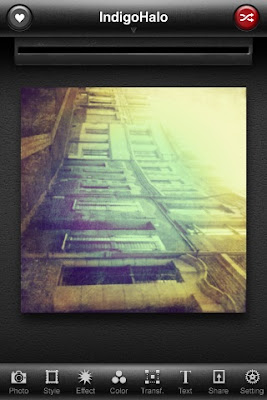
Choose INDIGO HALO
then
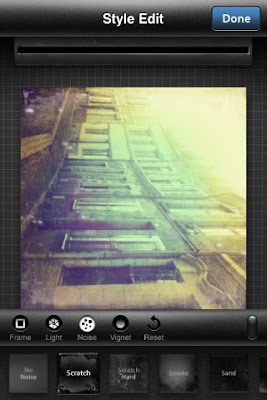
select the icon at the bottom of the screen named STYLE


Select the following settings
Frame = no frame, Light = No light leak, Noise = Scratch, Vignet = none
Hit DONE and save to camera roll (SHARE)
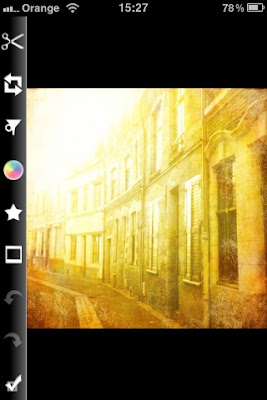
Now the photograph should look like this...


5.We're going to add some atmospheric blur in LoMob but we have to be a little tricksy about it. Here's why: the screenshots below illustrate where the blur would be applied to the photograph in its original layout...


I love the blur effect you get with the LoMob Tri-Black film preset BUT I want to apply it to the left-hand side of the photograph rather than the right, so that the far end of the street is out of focus, and the grunge-texture in the lower left-hand corner is softened.
So...
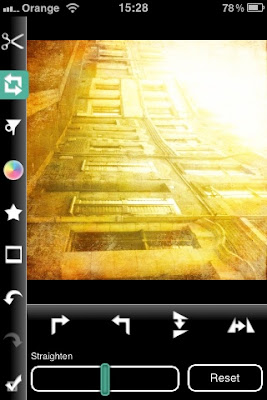
import the photograph back into PhotoGene and
rotate to look like this...


6. Add atmospheric blur to the desired part of photograph in LOMOB


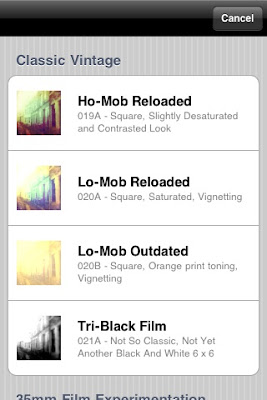
Select CLASSIC VINTAGE> TRI-BLACK


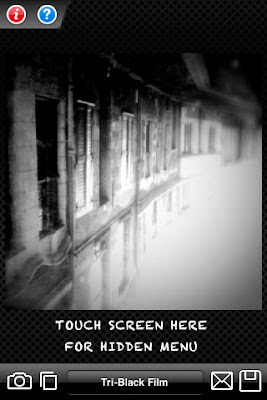
Anyone who remembers those wonderful point and click computer games MYST and RIVEN will feel a hint of nostalgia doing this next bit, because you're looking for an invisible button.
Touch the screen in the space shown in the above screenshot


Shazam!
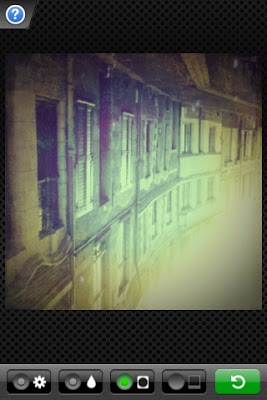
A set of buttons appear. Use these to switch elements of the preset on and off. If you copy the settings in the screenshot above and then hit the little wheel button on the bottom left of the screen, you'll switch off the B&W and vignette effects leaving just the blur
. However, you won't see the blur until you render a preview by hitting the green arrow/return icon on the bottom right of the screen. In case you're thinking that's a bit complicated, it is. Friendly message to LoMob developers: please get it sorted!


7. Flip and Rotate in PHOTOGENE (dizzy? I promise this is the last time)

I decided that I preferred the photograph's composition in reverse from the original and so saved it like this...


That's it, all done!

I hope you've found this tutorial both useful and enjoyable. Please do send feedback and if you've processed any of your own photographs whist following the tutorial, I'd love to see the results!


Monday, April 11, 2011

Making An Exhibition Of Myself


JANUARY WALKING: OUT OF SIGNAL
shot and processed iPhone 3GS


PILGRIMS OF LIGHT: LAST ASCENT TO THE RED CROSS
shot and processed iPhone 3GS


TOUCH
shot and processed iPhone 3GS


Jo Archer recently asked me if I'd had any of my work exhibited and I'm delighted to report that over the last 12 months, examples of my iPhoneography have featured in five exhibitions in Germany (Berlin); USA (New York and Kansas); Italy (Milan); and here in the UK (Bristol). Three of the photos are posted above.

The first two were selected for the Royal West of England Academy Open Photography 2. Although I can't be absolutely sure whether mine were the only iPhone images on display, they were certainly the only two to be labled as such. Some of you might recall that January Walking: Out Of Signal was shot on New Year's Day, when I was lost, halfway up a Welsh hillside, and my iPhone was well and truly out of signal. The friend who we were with at the time has since assured us that he now knows the hill at the back of his house as well as he knows the back of his hand. The second photograph depicts a journey that we know quite well as we have taken it once for the last eight years. Pilgrims Of Light, Last Ascent To The Red Cross was shot during our last night at the 2010 Lyon Festival des Lumières, as we made our way up the side of the steep cliff that led back to our hotel in the Croix Rousse District.

Last Ascent To The Red Cross is currently also on display, along with Touch, at the Pixels At An Exhibition Show in Kansas. Touch was originally a screenshot of an erotic film clip playing on my Macbook.

Since last year, when my first iPhone collage tutorial was published in Somerset Digital Studio, I've had lots of requests for more. It's long been my intention to build a tutorials website but ill-health has led to it being a very stop-start project. However, I'm just begining to compile new tutorials and hope to roll them out over the next few months, possibly on a seperate blog or site as I'm also getting back to Digi-Scrapping and think there's a need to keep the two activities seperate and so easier to find.

Here's the photograph I'm currently writing a tutorial for


and here's a Hipstamatic shot of the view through my studio window, where I'm sitting now...


Posted using BlogPress from my iPad:

Friday, November 5, 2010

The leaves that are green turn to brown


OCTOBER WALKING 01
shot & processed iphone 3GS


OCTOBER WALKING 02
shot & processed iphone 3GS


OCTOBER WALKING: THE OLD TRACK
shot & processed iphone 3GS


OCTOBER WALKING: THIS FAR, NO FURTHER
shot & processed iphone 3GS


This is my first post in over a month and the first one written from my new studio. It is everything I'd hoped for: there is (pretty much) room for everything and the space is light and airy but at the same time, a warm and snug retreat from where I can watch the seasons change as I work. This afternoon, twilight and raindrops are falling on our pond and clinging to the bare branches of the elder tree. To my right, I should be able to catch a glimpse of the hill, but shrouded in English Autumn weather, it has completely disappeared from view. A few weeks ago, I took a walk up there and shot the photographs that were the beginnings of the images posted above. The apps used were Toy Camera, PhotoFx, Iris and Photo Copier.