Sunday, May 29, 2011

Solace


SOLACE

Shot iPhone 3GS, processed iPhone and iPad


Finally, we have had some rain. Not enough to top-up the pond, but enough to kiss the leaves and petals of grateful roses. We have planted one over our dear little cat, who finally slipped away, early one morning, a few weeks ago. She's buried under the beautiful Elder, next to my studio, so I can keep an eye on her and she'll always be close, which is just how she would have liked it.


Thursday, May 26, 2011

Still Living


LAID TO REST


FEATHERSEED


ANGELIC APPARATUS


Shot iPhone 3GS, processed iPad
Museum In The Park: Stratford Park, Stroud, Gloucestershire


HUNTED


HUNTER


Shot and processed iPhone 3GS
Doncaster Museum, Doncaster, South Yorkshire


Objects displayed in museum cabinets or tableaux, still and silent.
Returning home, I contemplate other possibilities...

Friday, May 13, 2011

Offerings


FLOWER OF MONTPARNASSE


LOYASSE: FLOWERS OF MICHEL BRACCO'S FAMILY


LOYASSE: FLOWERS OF JOSEPH, AMELIE AND FRANCISQUE BABEY 01


LOYASSE: FLOWERS OF JOSEPH, AMELIE AND FRANCISQUE BABEY 02


LOYASSE: FLOWERS OF FRANCIS NAILLOT WHO DIED IN THE CATASTROPHE DE ST. JEAN 13th NOVEMBER 1930


LOYASSE POPPIES


LOYASSE: WEEDS ON THE GRAVE OF A FAMILY WHOSE NAME CANNOT BE READ, ON A PLOT WITH AN EXPIRED LEASE


LOYASSE: PRESENCE AT THE DOOR


These images are a selection from an on-going series
of explorations.
Flower Of Montparnasse: photographic montage incorporating page from 1930s hairdressing manual and flowers on a grave in Montparnasse Cemetery, Paris. All other images: Loyasse Cemetery, Lyon.
Shot iPhone 3GS. Processed iPhone 3GS and iPad 1


Tuesday, April 26, 2011

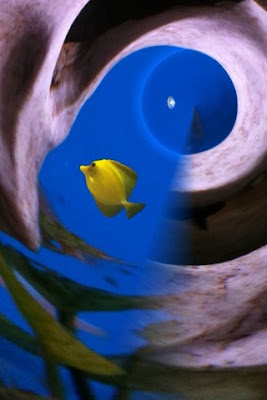
iPhone Tutorial 02: Little Fishy Collages


GETTING LOST IS JUST PART OF THE PROCESS

iPhone 3GS collage

Power-users beware! What follows is a very simple introduction to the art of creating collages with an iPhone. In this tutorial I'm going to demonstrate how to:
1. Create an interesting background with just one click of an app
2. Extract an element from a photograph and collage it onto another
3. Work with blur to blend two photographs together

First, a word about "kit": I spent a year making iPhone collages before a very kind friend gave me a stylus. As I'd taken about the same amount of time using a track pad to make digital collages and scrapbook layouts before I got around to buying a graphics tablet, I'm pretty nifty and precise with my index finger tip, but a stylus certainly makes tasks such as erasing large areas from photographs (which you do a lot of when making iPhone collages) much easier and you don't strain your hand and arm quite so much. there are several models on the market now and everyone has their favourite but I'm still using my Pogo Sketch.

OK...here we go!

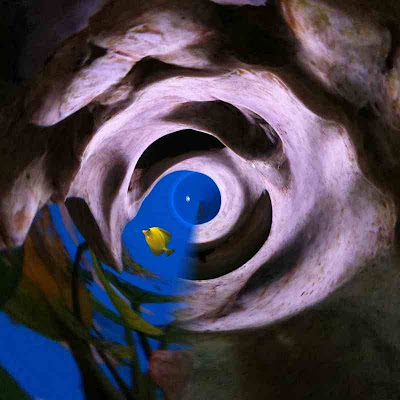
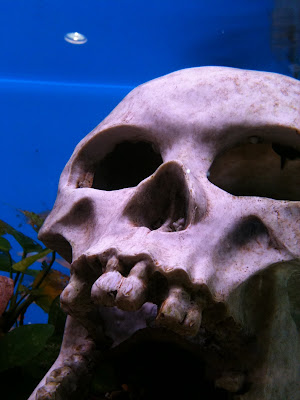
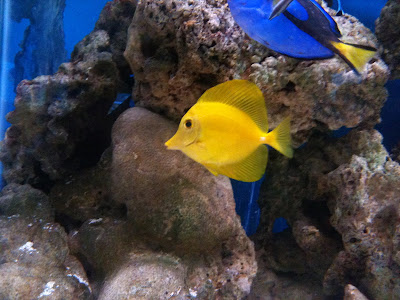
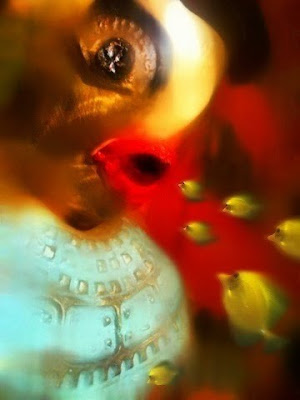
The image above began life as the following two photographs shot at my local aquarium supplies store...


These were "fast and dirty" shots: there are some odd colours, noise, blur, and a couple of undesirable elements but that's fine, we're going to work with them "as is" without any correction. Feel free to download them for use as you walk through the tutorial but please remember that they are for this purpose only and that the originals or work made with them still retain my copyright.

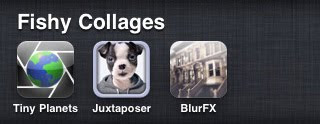
These are the apps we'll be playing with...


STEP1. TINY PLANETS: create an abstract background

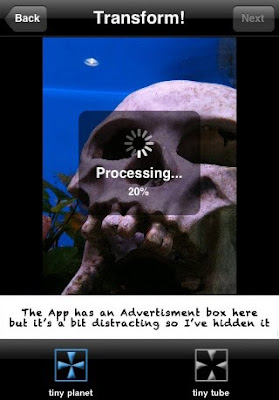
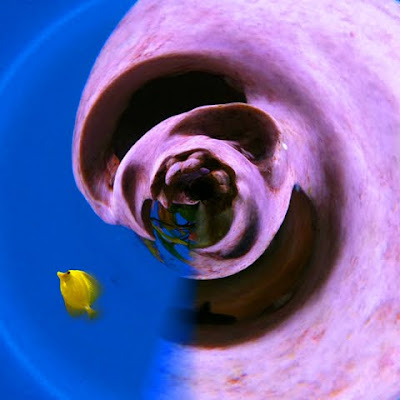
Import the skull into the app, hit the Tiny Planet icon at the bottom of the screen, left hand side and...


wheeeeeeeee...


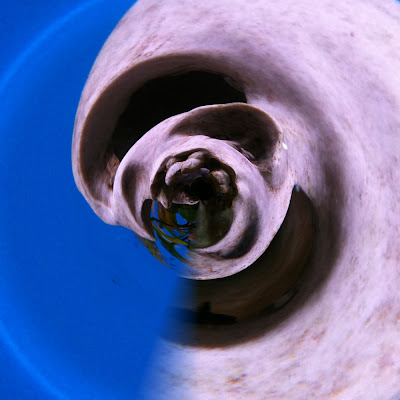
Our skull comes out of the blender looking like a piece of modern sculpture.
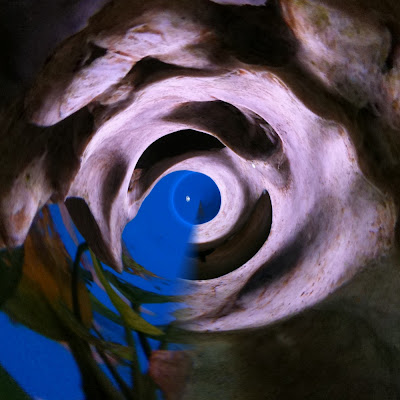
So what does the Tiny Tube button do? Try it!


Marvelous! We're going to work with this second version so save it to camera roll.

STEP 2. JUXTAPOSER: Extract fish from photograph and collage onto the background created with Tiny Planets

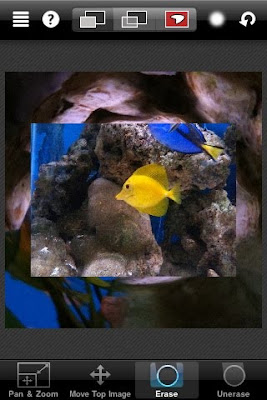
Following the on-screen prompts, import both photographs into Juxtaposer. Your screen should look like something like this:


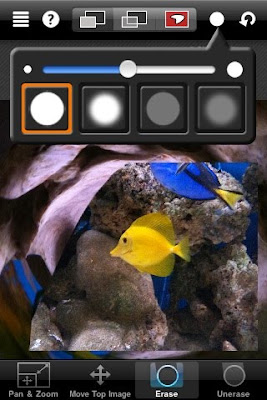
Now Select Erase. The icon at the top right hand side of the screen, next to the undo icon, is the brush modification button. We're going to erase a large portion of the photograph so to begin with, choose a largish, opaque, hard brush...


Use Pan & zoom to get closer in...


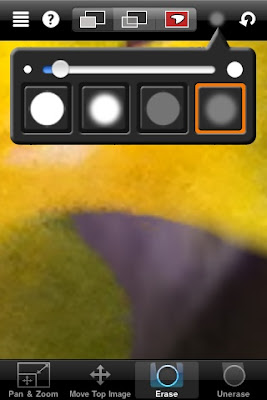
As you get closer to the fish's body, make the brush smaller, softer and more transparent to give the fish a soft edge that will blend into the background.

You may wish to use the Move Top Image tool to move the fish into the blue area where it's easier to distinguish her from the background.


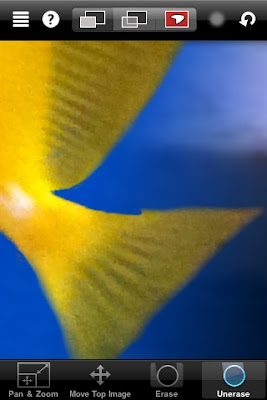
If you nibble in too far, you can always select the Unerase tool and paint some of the photograph back into the image.

Once you're satisfied with the fish, reposition and re-size her. at this point, it's also a good idea to save the fish as a "Stamp", in case you want to use it again: to find this option, select the icon in the top left hand corner > Save > Save masked top image as stamp.
Whilst in this menu, select Save Image: this will merge fish and background, and save to camera roll. Here's a close up of the little fish in her final position:


Good work! However, I am picky and despite using a soft brush to extract fishy from her original background, she still looks just a little too hard-edged and "stuck on" for my liking. So on to...

STEP 3. BLUR FX: add blur

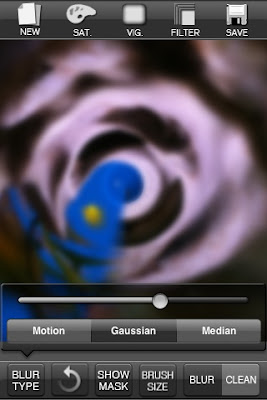
Select Gaussian blur and use the slider to modify the strength of the effect.


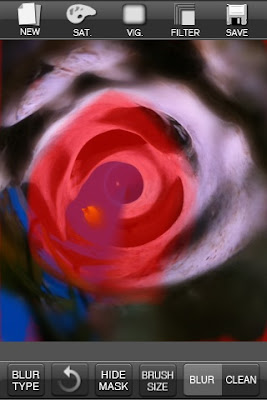
By switching the mask on and off, you can see how much of the blur you're removing or applying...


...and what the effect looks like. In this instance, we're using the CLEAN brush to erase almost all of the blur effect, just leaving a soft edge at the back of the fish to blend her with the background and give a sense of movement...


As in Juxtaposer, the brushes in Blur FX can be modified for work in smaller areas and tight corners.

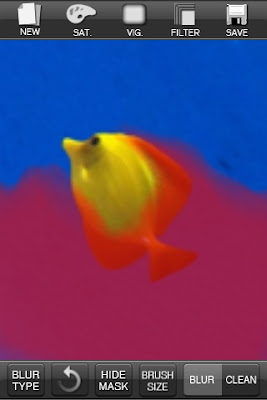
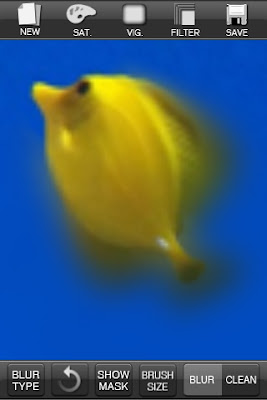
When you have erased most of the red mask from around and inside the fish, turn off the mask to check how it looks. If you've gone to far with the cleaning job, you can always select the BLUR tool and brush the effect back to the image where required.


Just to remind you, here's what the final collage looks like...


I am in love with this intrepid little fish. Here's a companion piece created with the Tiny Planets mash of the skull...


SWIMMING OUT OF THE SKULL

Finally, here's a collage created using just BLUR FX and JUXTAPOSER...


THE ONE THAT GOT AWAY
iPhone 3GS collage

I hope you've found this tutorial useful and fun. I'd love to see your collage creations so please do share links!

Digital collages with iPad and iPhone


THE FIXED POINT

iPad collage

Then I first acquired my iPhone in November 2009, I made nothing but collages with it and my camera roll fast became a rag-tag repository for photographs of rather odd objects and textures that I'd later cut, paste and blend into miniature mash-ups. Eventually, I became frustrated with the practical limitations and resolution output of most of the apps I'd been using. Also, being a flighty, creative type, I wanted to experiment with other camera apps and techniques. So, as you do, I moved on, but the lure of virtual scissors and glue is strong and I've recently returned to collage, but this time on I'm also working with my iPad. It's still a fiddly process, but as the screen is larger, it's slightly less of a strain on the eyes.
The collage above is the latest one I've done but for the sake of those of you who have only recently discovered my blog, here are some I made earlier, with my iPhone...

TIME FLUTTERS BY

A WISH

JAMIE'S BIRD


SUMMER SISTERS


A BOY'S OWN STORY


FRAGMENT 01

I'm preparing a simple tutorial that features two recent iPhone collages. It's almost ready and will be posted here later on today or tomorrow.
See you later!


Friday, April 15, 2011

iPhoneography Tutorial 01: Vintage French Street Scene


Over the last year, I've had many requests for iPhoneography tutorials and I'm finally getting down to it. Today I'm going to share the process by which I transformed this photograph, shot with my iPhone 3GS, whilst wandering around "le vieux Lille" in December 2010...


Into this...


Before we begin, a few words about technical perfection. Currently, I use an iPhone 3GS, which everyone agrees, does not have a great camera. Many iPhoneographers utilise apps designed to extend the capability of iPhone cameras but as I like to make images that look flawed in some way, I find that it helps if I begin with a less than perfect photograph. That way, any under or over-exposed areas, motion blur and odd reflections inform my compositional and processing choices. They also give me a head-start in the grunge stakes.

If you wish to work with my original photograph whilst following this tutorial, feel free to download it. However, please remember that the photograph and any processed versions of it, retain my copyright and are not to be used for any other purpose other than following the tutorial.

Ready? Ok! So here are the apps you'll need:


1. Resize, Crop and recolour: 100 Cameras in 1

Before importing an image onto this app, check the export resolution settings: Splash Screen> Options>Resolution (I choose high so that I can print the image if I wish)

This must surely rank as the most girlie iPhoneography app EVER. If you're attempting any kind of diet or Lenten abstinence, I recommend that you abandon this tutorial right now! 100 Cameras in 1 starts up with a sweet little tinkly tune that might make you think that you've downloaded a bliss-out meditation app by mistake. Once you've imported a photograph, you're greeted with an image depicting a stack of delicious-looking biscuits accompanied by the message: "baking cookies mmmm". The iPad version is even more potentially hazardous, tempting us with seductive Belgium Chocolates. You have been warned!


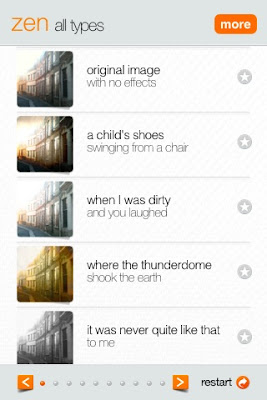
Once you've imported a photograph, you can resize/crop it within the app before browsing through 100 poetically-named presets, grouped into sets of ten
Choose ZEN>"where the thunderdome shook the earth"

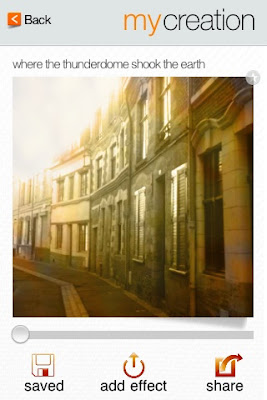
The next screen provides a slider so that, if you wish, you can modify the preset
We are going to select the lowest setting and save to camera roll.


This app is described as a game and has some kind if point-scoring system. As I’m not remotely competitive, I haven’t looked into this. If someone tells me I’ll win real cookies and chocolates if I collect points, then obviously, I will pay more attention.


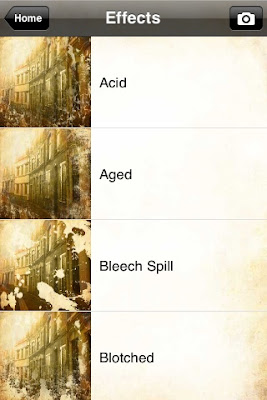
2. Add texture: PIC GRUNGER

Once again, before importing a photograph into this app, select the RESOLUTION button on the splash screen to set your desired output resolution. Happy? Ok, now import!


In EFFECTS choose AGED


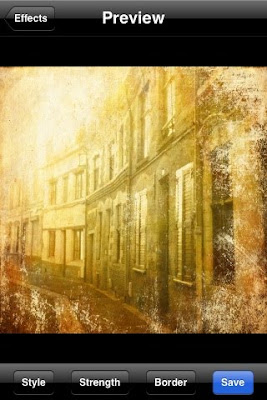
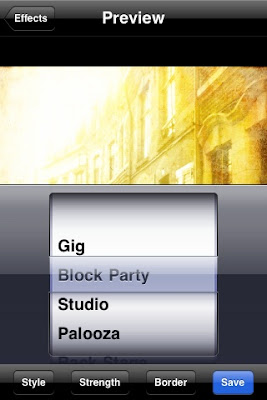
The preview screen displays the photo with applied effect and offers further opportunities to modify it. Select STYLE


select BLOCK PARTY (yay!)


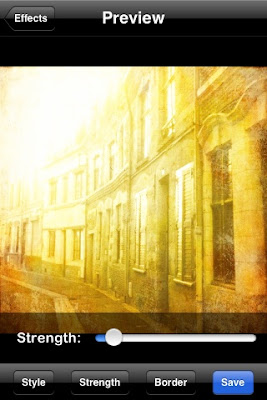
Select STRENGTH and adjust with the slider
(I chose a low setting: don't want the neighbours complaining about the noise)


3. Rotate image in PHOTOGENE and save to camera roll


I incorporate rotation into my work flow so that any generic app presets such as grunge effects and light leaks won't be applied in the same areas of every single image and hopefully, the apps used will be less recognisable.


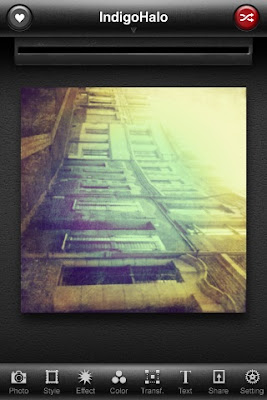
4. Adjust colour and add extra texture in PICTURE SHOW


Choose INDIGO HALO
then
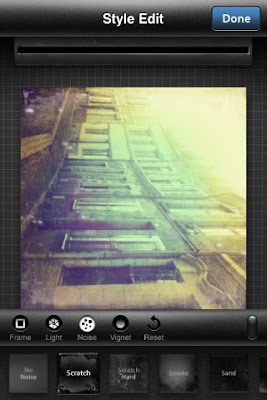
select the icon at the bottom of the screen named STYLE


Select the following settings
Frame = no frame, Light = No light leak, Noise = Scratch, Vignet = none
Hit DONE and save to camera roll (SHARE)
Now the photograph should look like this...


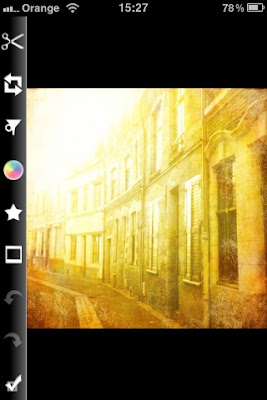
5.We're going to add some atmospheric blur in LoMob but we have to be a little tricksy about it. Here's why: the screenshots below illustrate where the blur would be applied to the photograph in its original layout...


I love the blur effect you get with the LoMob Tri-Black film preset BUT I want to apply it to the left-hand side of the photograph rather than the right, so that the far end of the street is out of focus, and the grunge-texture in the lower left-hand corner is softened.
So...
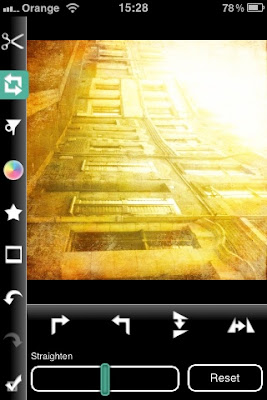
import the photograph back into PhotoGene and
rotate to look like this...


6. Add atmospheric blur to the desired part of photograph in LOMOB


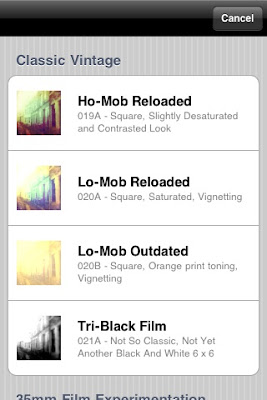
Select CLASSIC VINTAGE> TRI-BLACK


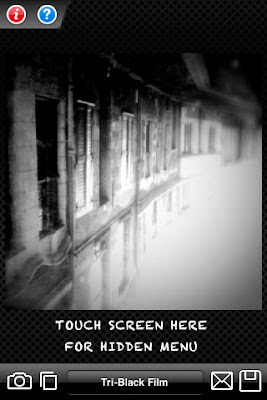
Anyone who remembers those wonderful point and click computer games MYST and RIVEN will feel a hint of nostalgia doing this next bit, because you're looking for an invisible button.
Touch the screen in the space shown in the above screenshot


Shazam!
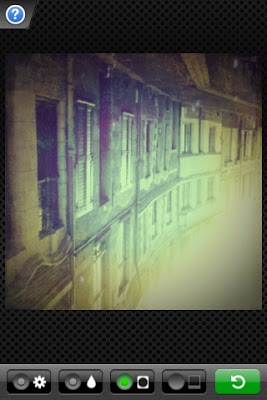
A set of buttons appear. Use these to switch elements of the preset on and off. If you copy the settings in the screenshot above and then hit the little wheel button on the bottom left of the screen, you'll switch off the B&W and vignette effects leaving just the blur
. However, you won't see the blur until you render a preview by hitting the green arrow/return icon on the bottom right of the screen. In case you're thinking that's a bit complicated, it is. Friendly message to LoMob developers: please get it sorted!


7. Flip and Rotate in PHOTOGENE (dizzy? I promise this is the last time)

I decided that I preferred the photograph's composition in reverse from the original and so saved it like this...


That's it, all done!

I hope you've found this tutorial both useful and enjoyable. Please do send feedback and if you've processed any of your own photographs whist following the tutorial, I'd love to see the results!